dacor oven manual
Dacor Oven Manual: A Comprehensive Guide (Updated 02/03/2026)
This manual details Dacor oven operation, encompassing features, safety, troubleshooting, and maintenance—a resource for optimal performance and longevity of your appliance.
Dacor represents a legacy of innovation and precision in the realm of luxury kitchen appliances. For decades, Dacor has been synonymous with exceptional performance, elegant design, and cutting-edge technology, specifically within the oven category. This manual serves as a comprehensive guide to understanding and utilizing your Dacor oven, ensuring years of reliable service and culinary success.
Dacor ovens are engineered to meet the demands of passionate home chefs and discerning individuals who appreciate quality and sophistication. From intuitive controls to advanced cooking modes, each feature is meticulously crafted to elevate your cooking experience. This guide will walk you through everything from initial setup and safety precautions to advanced features and troubleshooting, empowering you to unlock the full potential of your Dacor oven. Explore Dacor’s high-end performance line and find inspiration!
Understanding Your Dacor Oven Model
Each Dacor oven model boasts a unique set of features and specifications designed to cater to diverse culinary needs. Identifying your specific model number is crucial for accessing tailored support and resources. This number, typically found on a label inside the oven frame or on the appliance’s exterior, unlocks access to specific documentation and parts lists.
Familiarize yourself with the oven’s dimensions, capacity, and power requirements. Understanding these details ensures proper installation and optimal performance. Dacor ovens often incorporate advanced technologies like convection cooking, self-cleaning cycles, and smart connectivity. This manual will detail the functionality of these features specific to your model. Refer to the included diagrams and illustrations to pinpoint component locations and understand control panel layouts, maximizing your oven’s potential.
Safety Precautions & Important Warnings
Prioritizing safety is paramount when operating your Dacor oven. Always ensure proper ventilation during use to prevent carbon monoxide buildup. Never use aerosol sprays near the oven, as they are highly flammable. Exercise extreme caution when handling hot surfaces; utilize oven mitts or pot holders. Keep children away from the oven during operation and immediately after, as surfaces remain hot for a considerable time.
Do not attempt to repair the oven yourself; contact a qualified technician for any maintenance or repairs. Disconnect the power supply before cleaning or performing any maintenance. Avoid using harsh chemicals or abrasive cleaners, as they can damage the oven’s surfaces. Be mindful of the self-cleaning cycle, ensuring proper ventilation and removing all racks before initiating. Ignoring these warnings could result in injury or damage.
Oven Features & Controls
Explore the advanced functionalities of your Dacor oven, including intuitive controls, customizable display settings, and versatile oven modes for exceptional cooking results.
Control Panel Overview
The Dacor oven control panel is designed for intuitive operation, offering a seamless cooking experience. Typically, you’ll find a full-color touchscreen display providing access to all oven functions. Key elements include the function selector dial, allowing you to choose between baking, broiling, convection, and specialized modes like proofing.
Temperature controls are usually managed via plus and minus buttons or direct touchscreen input. A dedicated timer function enables precise cooking duration settings. Many models feature pre-programmed cook settings for common dishes, simplifying meal preparation. Additionally, the control panel houses options for customizing display brightness, sound volume, and language preferences. Explore the menu options to discover personalized settings and unlock the full potential of your Dacor oven.
Display Settings & Customization
Your Dacor oven’s display offers extensive customization options to enhance usability. Access the settings menu, typically through a dedicated icon on the touchscreen, to adjust brightness levels for optimal visibility in various kitchen lighting conditions. You can also modify the display’s color scheme to suit your aesthetic preferences.
Sound settings allow you to control the volume of audible alerts, such as preheat chimes and timer notifications, or even disable them entirely. Language preferences can be altered to display the interface in your preferred language. Furthermore, some models permit the customization of the home screen layout, prioritizing frequently used functions for quick access. Explore these settings to personalize your Dacor oven experience and tailor it to your individual needs.
Understanding Oven Modes (Bake, Broil, Convection)
Dacor ovens offer versatile cooking modes to suit diverse culinary needs. The Bake mode utilizes lower heating elements for consistent, even cooking – ideal for cakes, casseroles, and breads. Broil employs a high-intensity upper element, perfect for searing meats and browning gratins; always use the broil pan provided.
Convection mode incorporates a fan to circulate hot air, resulting in faster, more uniform cooking and browning. This is excellent for roasting poultry, baking multiple trays of cookies, or achieving crispy textures. Some models feature True Convection, offering even greater temperature consistency. Understanding these modes allows you to optimize cooking results and achieve professional-quality dishes. Experiment with each mode to discover its unique benefits for your favorite recipes.
Using Your Dacor Oven
Effectively utilizing your Dacor oven involves precise temperature setting, timer management, and selecting the appropriate cooking mode for optimal results every time.
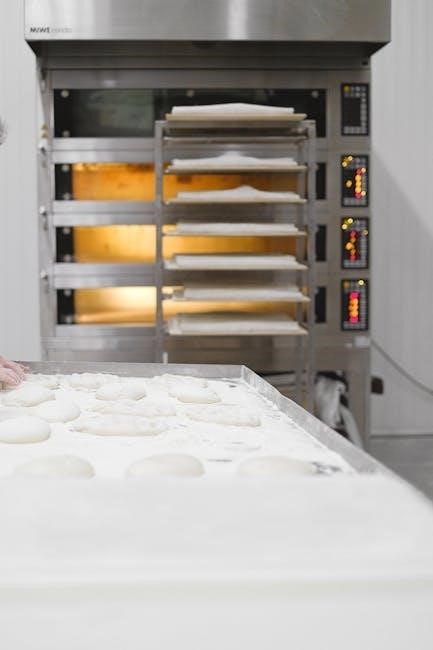
Preheating the Oven
Proper preheating is crucial for consistent and accurate cooking results with your Dacor oven. To begin, ensure the oven rack is positioned correctly for your intended baking or roasting task. Select your desired oven mode – Bake, Convection Bake, or Broil – using the control panel. Then, set the temperature to the recipe’s specification.
Dacor ovens often feature a preheat indicator, typically a light or a message on the display, signaling when the oven has reached the set temperature. Do not place food inside until the preheat cycle is complete. Preheating times vary depending on the selected temperature and oven mode; higher temperatures naturally require longer preheating periods.
For convection baking, preheating is especially important as the fan circulates heat for even cooking. Some Dacor models offer a ‘Rapid Preheat’ function, which significantly reduces preheating time, though it may slightly affect temperature accuracy. Always refer to your specific model’s manual for detailed preheating instructions and recommended times.
Setting the Temperature & Timer
Adjusting the oven temperature is straightforward using the Dacor control panel. Utilize the up and down arrow keys, or the numeric keypad if equipped, to input the desired temperature in Fahrenheit or Celsius, depending on your model’s setting. The current set temperature will be clearly displayed on the oven’s screen.
To set the cooking timer, press the ‘Timer’ button. Use the control panel to input the desired cooking duration. The timer will begin counting down, and an audible alert will sound when the time elapses. Dacor ovens often allow for delayed start functionality, enabling you to program the oven to begin cooking at a later time.
Some models feature a ‘Keep Warm’ setting, maintaining a low temperature after the timer expires. Always double-check the set temperature and timer before initiating the cooking process to ensure accurate results.
Using the Convection Feature
Dacor convection ovens utilize a fan to circulate hot air, ensuring even cooking and faster preheating. To activate convection, select the ‘Convection Bake’ or ‘Convection Roast’ mode on the control panel. Note that convection cooking often requires a temperature reduction of 25°F (15°C) compared to conventional baking.
For optimal results, use low-sided baking sheets when employing the convection feature, allowing for maximum air circulation. Convection is particularly effective for roasting meats, baking cookies, and preparing multiple dishes simultaneously.
Some Dacor models offer ‘True Convection’ or ‘European Convection’, providing even more consistent temperatures. Refer to your specific model’s manual for detailed instructions and recommended cooking times when utilizing convection settings.
Utilizing the Broil Function
The broil function in your Dacor oven provides intense, direct heat from above, ideal for browning, searing, and finishing dishes. To broil, select the ‘Broil’ setting on the control panel and adjust the temperature. Dacor ovens typically offer high and low broil options; low broil is recommended for delicate foods;
Always use broil-safe cookware and position the oven rack appropriately – usually the highest or second-highest position – to achieve desired results. Monitor food closely during broiling, as it can burn quickly. Leaving the oven door slightly ajar (as indicated in your model’s manual) can help regulate temperature.
For even browning, consider using the convection broil setting if your model offers it. Remember to exercise caution when broiling, as the oven interior reaches extremely high temperatures.

Cleaning & Maintenance
Regular cleaning preserves your Dacor oven’s performance and extends its lifespan; this section details self-cleaning cycles, manual procedures, and component care.
Self-Cleaning Cycle Operation
Dacor ovens feature a self-cleaning cycle utilizing high temperatures to burn off food residue, minimizing manual scrubbing. Before initiating, remove racks, cookware, and any loose debris. Ensure proper ventilation by opening windows, as the process can generate odors.
Select the self-clean cycle on the control panel, choosing the desired cleaning duration (light, medium, or heavy soil). The door automatically locks for safety during operation and remains locked until the oven cools sufficiently. Avoid opening the door mid-cycle.
Once completed, allow the oven to cool completely before wiping away any remaining ash with a damp cloth. Note that the self-clean cycle can sometimes trigger error codes if issues are detected; consult the troubleshooting section for guidance; Regular use of the self-clean function helps maintain optimal oven performance.
Manual Cleaning Procedures
For lighter cleaning or between self-clean cycles, manual cleaning is effective. Begin by ensuring the oven is cool. Prepare a cleaning solution of baking soda and water, forming a paste. Apply this paste to interior surfaces, avoiding heating elements and the oven door gasket.
Allow the paste to sit for at least 20-30 minutes to loosen grime. Then, using a non-abrasive sponge or cloth, gently scrub the interior. For stubborn spots, a specialized oven cleaner can be used, following manufacturer’s instructions carefully and ensuring adequate ventilation.
Rinse thoroughly with clean water, removing all traces of cleaning solution. Dry the interior with a soft cloth. Regular manual cleaning prevents buildup and maintains oven efficiency. Avoid harsh chemicals that could damage the oven’s finish.
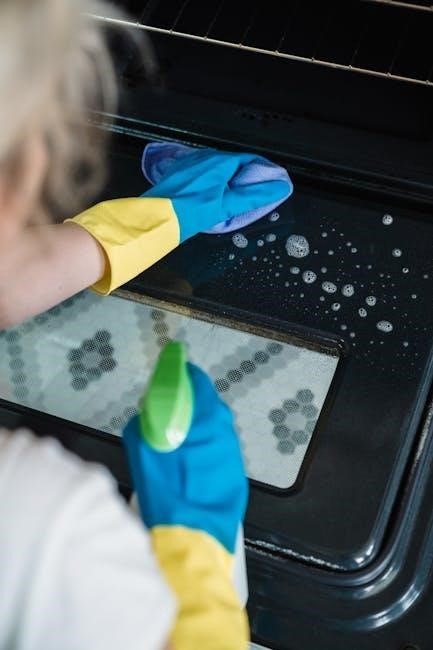
Cleaning the Oven Door & Glass
Maintaining a clear oven door is crucial for visibility. For routine cleaning, use a glass cleaner specifically designed for ovens. Spray the cleaner onto a soft cloth, not directly onto the glass, to prevent streaking. Gently wipe the interior and exterior surfaces of the door.
For baked-on residue, create a paste of baking soda and water. Apply to the affected areas, let sit for 30 minutes, then scrub gently with a non-abrasive pad. Avoid using abrasive cleaners or scouring pads, as they can scratch the glass.
If your Dacor oven has a removable door, consult the manual for instructions on safe removal and cleaning. Ensure the door is securely reattached before operating the oven. Regular cleaning prevents buildup and ensures optimal viewing.
Maintaining the Oven Interior
Regular interior maintenance extends your Dacor oven’s lifespan and ensures optimal cooking performance. After each use, wipe down the interior with a damp cloth to remove spills and splatters. Avoid harsh abrasive cleaners, which can damage the enamel coating.
For stubborn baked-on food, utilize the self-cleaning cycle (refer to the dedicated section). Alternatively, a paste of baking soda and water, left to sit for a period, can loosen residue for easier removal.
Inspect the oven racks periodically for any buildup and clean them separately with warm, soapy water. Ensure all cleaning products are thoroughly rinsed away before using the oven. Proper interior care prevents odors and maintains cooking efficiency.
Troubleshooting Common Issues
This section provides solutions for typical Dacor oven problems, including heating failures, error codes, temperature inaccuracies, and self-clean cycle malfunctions.
Oven Not Heating
If your Dacor oven isn’t heating, first verify the power supply – ensure the oven is properly plugged in and the circuit breaker hasn’t tripped. Check the control panel to confirm the oven is set to an appropriate cooking mode (Bake, Broil, Convection) and that a temperature has been selected. A faulty igniter is a common cause; if you hear clicking but no flame, this is a likely culprit and requires professional attention.
Additionally, inspect the oven’s safety features. Some models have a child lock or a delayed start function that might be inadvertently activated. Examine the bake element for any visible breaks or damage. If the element appears intact, a malfunctioning oven control board could be the issue. Do not attempt to repair electrical components yourself; always contact a qualified Dacor service technician for diagnosis and repair. Ignoring the problem could lead to further damage or safety hazards.
Error Codes & Their Meanings
Dacor ovens utilize error codes to diagnose internal issues, displayed on the control panel. A code like “E1” might indicate a temperature sensor failure, requiring replacement by a qualified technician. “E2” often signals a problem with the igniter, preventing gas flow and heating. “E3” could point to an issue with the control board itself, potentially needing reprogramming or complete replacement.
Consult the complete error code list in the appendix of this manual or on the Dacor website for a precise definition of each code. Do not attempt self-repair based solely on the code; accurate diagnosis is crucial. Record the error code before contacting Dacor customer support or scheduling a service appointment. Providing the code will expedite the troubleshooting process and ensure the technician arrives prepared with the necessary parts. Ignoring error codes can lead to escalating problems and costly repairs.
Temperature Inaccuracies
If your Dacor oven consistently cooks hotter or colder than the set temperature, several factors could be at play. A miscalibrated oven temperature requires adjustment through the oven’s settings menu – refer to ‘Display Settings & Customization’ for instructions. Ensure the oven door seals properly; a damaged seal allows heat escape, impacting internal temperature. Avoid frequently opening the door during baking, as this causes temperature fluctuations.
Check for proper ventilation around the oven; obstructions can affect airflow. A faulty temperature sensor may also be the culprit, necessitating professional diagnosis and replacement. Use an oven thermometer to independently verify the internal temperature. If inaccuracies persist after these checks, contact Dacor support for assistance, providing details about the observed discrepancies.
Self-Clean Cycle Problems
If your Dacor oven’s self-clean cycle fails to initiate, ensure the oven door is completely locked. A faulty door latch prevents the cycle from starting for safety reasons. Remove all racks, cookware, and any loose debris before running the self-clean function. Excessive smoke during the cycle can indicate accumulated grease or food particles. If the cycle stops prematurely, check for power interruptions or tripped circuit breakers.
A persistent error code (refer to ‘Error Codes & Their Meanings’) signals a potential issue with the self-clean components. Avoid opening the door during the cycle, as extremely high temperatures are present. After the cycle completes, allow the oven to cool completely before unlocking and cleaning any remaining ash. Contact Dacor support if problems persist.

Advanced Features & Settings
Explore specialized modes like proofing for dough rising and a warming drawer to maintain food temperatures, enhancing culinary versatility within your Dacor oven.
Proofing Mode Operation
Dacor ovens equipped with a proofing mode provide a consistently warm and humid environment, ideal for optimal yeast activation and dough development. To initiate proofing, select the “Proof” setting on the control panel; the oven will maintain a temperature typically between 80°F and 90°F.
Ensure your dough is covered loosely with plastic wrap or a damp cloth to prevent drying. Proofing times will vary depending on the recipe and desired rise; regularly check the dough’s progress. Avoid opening the oven door frequently during proofing, as this can disrupt the temperature and humidity.
Some models may offer adjustable proofing temperatures. Refer to your specific model’s settings for customization options. Once proofed, proceed with baking according to your recipe instructions. Proper proofing results in lighter, airier baked goods.
Warming Drawer Functionality (if applicable)
If your Dacor oven features a warming drawer, it provides a convenient space to keep cooked foods at serving temperature without overcooking. To operate, select the “Warming Drawer” setting on the control panel and choose your desired temperature – typically ranging from 170°F to 210°F.
The warming drawer is ideal for holding casseroles, baked goods, or plated meals. Avoid using the warming drawer for prolonged periods, as food quality may degrade. Do not use the warming drawer to proof dough, as the temperature is not optimized for yeast activation.
Ensure food is covered to retain moisture. Always follow food safety guidelines regarding holding temperatures and times. Refer to your specific model’s manual for detailed instructions and recommended warming times for various food types.
Remote Control & Smart Features (if applicable)
Certain Dacor oven models integrate smart technology, enabling remote control and monitoring via a dedicated mobile app. Download the Dacor Connect app (available on iOS and Android) and follow the on-screen instructions to connect your oven to your home’s Wi-Fi network.
Once connected, you can preheat, adjust temperature, set timers, and even receive notifications when preheating is complete or cooking cycles end. Some models offer voice control compatibility with smart home assistants like Amazon Alexa or Google Assistant.
Explore the app’s features for customized cooking profiles and recipe integration. Ensure your oven’s software is up-to-date for optimal performance and security. Refer to the Dacor Connect app’s help section or the oven’s manual for detailed instructions.
Dacor Oven Parts & Accessories
Genuine Dacor parts and recommended accessories ensure optimal oven performance and longevity; explore options like replacement bulbs and specialized cookware for enhanced cooking.
Replacing Oven Bulbs
Replacing a Dacor oven bulb is a straightforward process, typically requiring a screwdriver and the correct replacement bulb—ensure the oven is cool and disconnected from power before starting. Locate the access panel, usually at the rear of the oven cavity, and remove any securing screws. Gently pull out the bulb cover and carefully remove the old bulb, noting its type (incandescent or halogen) for a proper replacement.
Insert the new bulb, ensuring it’s securely seated, and replace the cover and screws. Always handle halogen bulbs with a clean cloth to avoid oil contamination, which can shorten their lifespan. If the bulb is difficult to access, consult your Dacor oven’s specific model manual for detailed instructions and diagrams. Proper bulb replacement restores visibility within the oven, enhancing your cooking experience.
Finding Replacement Parts
Sourcing replacement parts for your Dacor oven is crucial for maintaining its performance and longevity. Dacor’s official website is an excellent starting point, offering a comprehensive parts catalog searchable by model number. Authorized Dacor service centers also stock genuine parts and can provide expert assistance in identifying the correct components.
Alternatively, reputable appliance parts retailers online and locally carry a wide range of Dacor oven parts. When ordering, always verify the part number to ensure compatibility with your specific model. Be cautious of generic or non-genuine parts, as they may not meet Dacor’s quality standards. Maintaining a record of your oven’s model and serial number simplifies the parts-finding process and ensures accurate replacements.
Recommended Accessories
Enhance your Dacor oven experience with a selection of recommended accessories designed for optimal performance and convenience. A high-quality oven thermometer ensures accurate temperature monitoring, crucial for precise baking and roasting. Consider a Dacor-approved baking stone for achieving professional-quality pizza and bread crusts.
Heavy-duty roasting pans and racks are essential for preparing large meals, while silicone baking mats prevent sticking and simplify cleanup. Oven-safe meat thermometers guarantee perfectly cooked proteins. Dacor also offers specialized accessories like steam pans for convection steaming and grill grates for indoor grilling. Investing in these accessories maximizes your oven’s capabilities and elevates your culinary creations.


Leave a Comment