
transfer case manual
Transfer cases are vital components in four-wheel drive and all-wheel drive vehicles‚ distributing power to the wheels for optimal traction and performance․
Understanding their operation and maintenance is crucial for vehicle longevity‚ especially when tackling challenging terrains or adverse weather conditions․
What is a Transfer Case?
The transfer case is a mechanical component situated within a vehicle’s drivetrain‚ typically found between the transmission and the front and rear axles․ Its primary function is to split torque from the engine and transmission‚ delivering it to all wheels simultaneously‚ or to select between two-wheel drive and four-wheel drive modes․
Unlike a standard transmission which focuses on gear ratios‚ the transfer case manages power distribution․ It often incorporates a chain or gears to achieve this split․ Modern transfer cases can be electronically controlled‚ offering automatic mode selection based on driving conditions․ Proper understanding of its operation is key to maximizing vehicle capability‚ especially in off-road scenarios or inclement weather․
Transfer Case Functionality
The core functionality of a transfer case revolves around managing torque distribution․ In two-wheel drive‚ it directs power to either the front or rear axle․ Engaging four-wheel drive locks the front and rear axles together‚ providing equal power delivery for enhanced traction․ Some systems offer a low-range gear‚ increasing torque for steep inclines or challenging obstacles;
Advanced transfer cases utilize viscous couplings or electronic clutches to vary power distribution dynamically․ This allows for all-wheel drive operation on paved roads‚ improving stability and handling․ Understanding the specific modes available on your vehicle – and when to utilize them – is crucial for optimal performance and preventing potential drivetrain damage․

Types of Transfer Cases
Transfer cases vary significantly‚ including part-time‚ full-time‚ and automatic on-demand systems‚ each designed for specific driving needs and vehicle applications․
Part-Time Transfer Cases
Part-time transfer cases mechanically lock the front and rear driveshafts together‚ providing a solid connection for maximum traction in off-road or slippery conditions; These systems are not intended for use on dry pavement‚ as the locked drivetrain can cause binding and damage due to differing wheel speeds during turns․
Typically‚ a driver manually engages part-time 4WD via a lever‚ button‚ or electronic switch․ They are commonly found in trucks and SUVs designed for serious off-roading․ Proper operation involves only engaging 4WD when needed and disengaging it immediately upon returning to dry‚ paved surfaces․ Ignoring this precaution can lead to premature wear and potential component failure within the transfer case and driveline․
Full-Time Transfer Cases
Full-time transfer cases differ significantly from part-time systems‚ allowing power to be distributed to all four wheels continuously․ They utilize a center differential‚ enabling the front and rear axles to rotate at different speeds‚ crucial for safe operation on paved roads․ This eliminates the binding issues associated with part-time 4WD on high-traction surfaces․
While offering enhanced all-weather capability‚ full-time systems generally don’t provide the same level of extreme off-road traction as a locked part-time case․ Some full-time transfer cases include a locking feature to simulate a part-time setup for challenging terrain․ Regular maintenance‚ including fluid checks and changes‚ is vital for optimal performance and longevity of these complex systems․
Automatic On-Demand Transfer Cases
Automatic on-demand transfer cases represent a sophisticated evolution in 4WD technology․ These systems proactively engage four-wheel drive only when wheel slip is detected‚ seamlessly transitioning between 2WD and 4WD without driver intervention․ They employ sensors and electronic controls to monitor wheel speeds and vehicle dynamics‚ optimizing traction in real-time․
This approach maximizes fuel efficiency by avoiding unnecessary 4WD operation on dry pavement․ However‚ a slight delay in engagement can occur during sudden traction loss․ Regular fluid maintenance is paramount‚ as these systems rely on hydraulic clutches and precise electronic control․ Proper operation ensures optimal performance and prevents premature wear‚ offering a balance of capability and convenience․

Transfer Case Fluid Maintenance
Regular fluid checks and changes are essential for transfer case health‚ ensuring smooth operation and preventing costly damage from wear and overheating․
Checking Transfer Case Fluid Level
Locating the transfer case underneath your vehicle is the first step; it’s typically connected to the transmission․ Begin by identifying both the fill and drain plugs – they often require specific tools for removal․
With the vehicle on level ground and the engine warmed up (but off!)‚ carefully remove the fill plug․ Then‚ insert a dipstick or appropriate probe into the fill hole to gauge the fluid level․
Low fluid levels can signal a leak or internal consumption‚ demanding immediate attention․ Ensure the fluid reaches the designated “full” mark; if it’s below‚ adding the correct type of fluid is necessary․ Always consult your vehicle’s manual for the precise fluid specification and procedure․
Transfer Case Fluid Change Procedure
Begin by warming up the vehicle slightly‚ then safely secure it with jack stands․ Locate the drain plug on the transfer case and position a drain pan underneath․ Carefully remove the plug‚ allowing the old fluid to drain completely․
Inspect the drained fluid for metal shavings – their presence indicates internal wear․ Once drained‚ reinstall the plug with a new crush washer․ Next‚ locate the fill plug and remove it․
Using a pump or funnel‚ add the correct type and amount of transfer case fluid‚ as specified in your vehicle’s manual․ Reinstall the fill plug‚ and verify the fluid level․ Finally‚ run the vehicle briefly and recheck for leaks․
Recommended Transfer Case Fluid Types
Selecting the correct fluid is paramount for optimal transfer case performance and longevity․ Most modern transfer cases require a specific automatic transmission fluid (ATF) – often a multi-vehicle ATF designed for a wide range of applications․
Consult your vehicle’s owner’s manual or a reliable parts catalog to determine the exact fluid specification․ Using the wrong fluid can lead to premature wear‚ shifting problems‚ and even complete failure․
Commonly recommended fluids include Dexron VI‚ Mercon V‚ or specific fluids formulated for transfer cases․ Avoid using universal fluids unless they explicitly state compatibility with your vehicle’s transfer case․ Regular fluid changes‚ using the correct type‚ are essential for preventative maintenance․

Common Transfer Case Problems
Frequent issues include difficulty shifting modes‚ unusual noises during operation‚ and inconsistent power distribution‚ impacting traction and handling significantly․
Difficulty Shifting Between Modes
Experiencing trouble engaging or disengaging four-wheel drive‚ or switching between different modes‚ is a common indicator of transfer case problems․ This can manifest as a reluctance to shift‚ requiring excessive force‚ or a complete inability to select the desired mode․ Several factors can contribute to this issue‚ including low or contaminated transfer case fluid‚ worn or damaged shift linkage‚ or internal mechanical failures within the transfer case itself․
A malfunctioning solenoid‚ responsible for electronically actuating the shift mechanism in some models‚ can also prevent proper mode selection․ Ignoring this symptom can lead to further damage and potentially leave you stranded in a situation requiring four-wheel drive․ Prompt diagnosis and repair are essential to restore functionality․
Unusual Noises from the Transfer Case
Hearing clunking‚ whining‚ or grinding sounds emanating from the transfer case is a significant warning sign․ These noises often indicate internal damage‚ such as worn gears‚ failing bearings‚ or a broken chain․ The specific type of noise can offer clues about the nature of the problem; a whine might suggest low fluid or worn bearings‚ while a clunk could point to loose components or damaged gears․
Ignoring these sounds can lead to catastrophic failure‚ potentially causing complete loss of drivetrain function․ Regular inspection and fluid changes can help prevent these issues․ If unusual noises are present‚ immediate professional diagnosis is crucial to avoid further‚ more expensive repairs․
Inconsistent Power Distribution
Experiencing inconsistent power delivery between the front and rear wheels is a clear indicator of a potential transfer case issue․ This manifests as poor traction‚ especially during off-road driving or in slippery conditions like snow or ice․ The vehicle may feel unstable or exhibit unpredictable handling characteristics․ This symptom suggests a failure within the transfer case to properly distribute torque․
Possible causes include worn or broken chains‚ damaged gears‚ or a malfunctioning clutch pack․ Addressing this promptly is vital for maintaining vehicle control and preventing further damage to the drivetrain․ A professional inspection is recommended to diagnose the root cause and implement the necessary repairs․
Transfer Case Troubleshooting
Effective troubleshooting involves diagnosing 4WD light issues‚ identifying internal damage‚ and utilizing scan tools to pinpoint problems within the transfer case system․
Diagnosing 4WD Light Issues

A malfunctioning 4WD light can indicate several potential problems within the transfer case system‚ ranging from simple electrical faults to complex mechanical failures; Begin by visually inspecting the light bulb itself to rule out a simple burnout․ If the bulb is good‚ proceed to check the wiring harness and connectors associated with the transfer case and the 4WD system․
Look for any signs of corrosion‚ damage‚ or loose connections․ A scan tool can be invaluable in retrieving diagnostic trouble codes (DTCs) that pinpoint the source of the issue․ Common codes relate to the transfer case control module‚ wheel speed sensors‚ or the shift actuator․ Remember that a flashing 4WD light often signals a system malfunction requiring immediate attention to prevent further damage․
Identifying Internal Transfer Case Damage
Internal transfer case damage often manifests through noticeable symptoms during operation․ A key indicator is the presence of metal shavings in the transfer case fluid – a clear sign of gear wear or component failure․ Unusual noises‚ such as whining‚ clunking‚ or grinding sounds‚ emanating from the transfer case are also red flags․
Difficulty shifting into or out of four-wheel drive‚ accompanied by a lack of engagement or inconsistent power distribution‚ suggests internal issues․ A thorough inspection requires draining the fluid and visually examining the gears and bearings for signs of pitting‚ cracking‚ or excessive wear․ In severe cases‚ complete component failure may necessitate a rebuild or replacement of the entire transfer case assembly․
Using a Scan Tool for Diagnostics
Modern vehicles often integrate the transfer case with the vehicle’s electronic control system‚ allowing for diagnostic data retrieval via a scan tool․ This tool can reveal trouble codes related to the transfer case‚ such as sensor malfunctions or issues with the shift motor․ Monitoring live data streams provides insights into the transfer case’s operation‚ including gear position‚ speed sensors‚ and engagement status․
Analyzing this data can pinpoint intermittent problems or confirm suspected mechanical failures․ However‚ scan tool diagnostics should complement a physical inspection; codes only indicate a symptom‚ not necessarily the root cause․ Proper interpretation requires understanding the specific vehicle’s system and utilizing manufacturer-specific diagnostic procedures․

Transfer Case Repair and Replacement
Repair or replacement decisions depend on damage severity; rebuilds are viable for certain issues‚ while extensive damage often necessitates a full transfer case replacement․
When to Repair vs․ Replace
Determining whether to repair or replace a transfer case involves careful assessment of the damage and associated costs․ Minor issues‚ like a simple seal replacement or addressing a small leak‚ often warrant a repair․ However‚ if internal components exhibit significant wear‚ such as broken gears or a damaged chain‚ a rebuild or replacement becomes more practical․
A rebuild involves disassembling the transfer case‚ inspecting all parts‚ replacing worn or damaged components‚ and reassembling it․ This can be cost-effective for older vehicles or when specific parts are difficult to source․ Conversely‚ extensive damage‚ particularly to the case itself or multiple internal components‚ often makes replacement the more sensible option‚ ensuring long-term reliability and minimizing future issues․ Consider the vehicle’s overall condition and intended use when making this decision․
Transfer Case Rebuild Considerations
Embarking on a transfer case rebuild requires meticulous planning and a comprehensive understanding of the unit’s internal workings․ First‚ secure a detailed service manual specific to your vehicle’s transfer case model․ Thoroughly inspect all components for wear‚ damage‚ or cracks‚ documenting findings with photos․ Sourcing high-quality replacement parts is paramount; OEM or reputable aftermarket brands are recommended․
Specialized tools‚ like bearing presses and snap ring pliers‚ are often essential․ Maintaining cleanliness throughout the process is critical to prevent contamination․ Proper torque specifications must be adhered to during reassembly․ If you lack experience‚ consider professional assistance; improper rebuilding can lead to premature failure and further damage․ A successful rebuild demands patience‚ precision‚ and attention to detail․
Finding a Qualified Mechanic
Locating a mechanic specializing in transfer case repair is crucial for accurate diagnosis and effective solutions․ Seek technicians with demonstrable experience in four-wheel-drive systems and‚ ideally‚ specific training on your vehicle’s make and model․ Online reviews and referrals from trusted sources can provide valuable insights into a mechanic’s reputation․
Inquire about their diagnostic capabilities‚ including the use of scan tools for accessing transfer case control modules․ A qualified mechanic should be able to clearly explain the problem‚ proposed repairs‚ and associated costs․ Don’t hesitate to ask about their warranty on parts and labor․ Verify they use quality parts and adhere to industry best practices for a reliable and lasting repair․

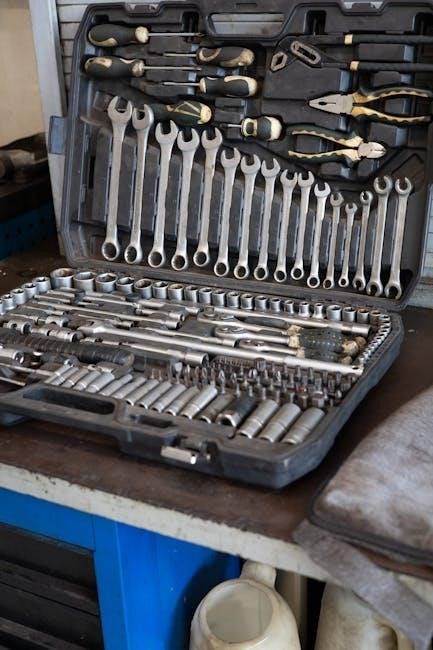
Special Service Tools for Transfer Cases
Specific tools are often needed for fluid changes‚ disassembly‚ and inspection of transfer cases‚ ensuring proper service and preventing damage to sensitive components․

Required Tools for Fluid Changes
Performing a transfer case fluid change requires a few essential tools to ensure a clean and efficient process․ First‚ you’ll need the correct wrench or socket size to remove both the drain and fill plugs‚ typically found on the sides of the transfer case․ A fluid drain pan is crucial for catching the old fluid‚ preventing a mess and facilitating proper disposal․
A funnel is necessary for pouring in the new fluid without spillage‚ and a pump can be helpful for reaching the fill plug in tight spaces․ Gloves and safety glasses are always recommended to protect your hands and eyes from the fluid․ Finally‚ a torque wrench is vital for tightening the plugs to the manufacturer’s specifications‚ preventing leaks or damage․ Examining the drained fluid for metal shavings is also important․
Tools for Disassembly and Inspection
Disassembling a transfer case for inspection or repair demands a more extensive toolkit․ A comprehensive socket set‚ including both metric and standard sizes‚ is fundamental‚ alongside various wrenches and ratchets․ Impact wrenches can expedite the removal of stubborn bolts‚ but caution is advised to avoid damage․ Specialized tools like a slide hammer may be needed for separating tightly fitted components․
For internal inspection‚ a borescope allows viewing hard-to-reach areas without complete disassembly․ Precision measuring tools‚ such as micrometers and calipers‚ are essential for assessing wear on gears and shafts․ A magnetic pickup tool helps retrieve dropped parts‚ and a parts tray keeps everything organized․ Finally‚ a service manual specific to your transfer case is invaluable for proper procedures and torque specifications․

Noise‚ Vibration‚ and Harshness (NVH) Troubleshooting
NVH issues in transfer cases often stem from worn bearings‚ damaged gears‚ or imbalances; careful diagnosis is key to pinpointing the source․
Identifying the Source of NVH
Pinpointing the origin of noise‚ vibration‚ and harshness (NVH) within a transfer case requires a systematic approach․ Begin with a thorough visual inspection‚ checking for any obvious signs of damage‚ such as leaks‚ worn seals‚ or loose components․
Next‚ attempt to isolate the noise by noting when it occurs – during acceleration‚ deceleration‚ shifting‚ or at a constant speed․ Road testing can help differentiate between speed-related vibrations and those linked to specific gear engagements․
Utilize a mechanic’s stethoscope to listen closely to the transfer case housing‚ identifying areas where the noise is most prominent․ Consider if the NVH changes with different transfer case modes (2WD‚ 4WD)․ Finally‚ remember that NVH can sometimes be transferred from other drivetrain components‚ so a holistic assessment is vital․
Common Causes of Transfer Case NVH
Several factors can contribute to noise‚ vibration‚ and harshness (NVH) originating from the transfer case․ Low or contaminated fluid is a frequent culprit‚ reducing lubrication and increasing friction between internal gears․ Worn or damaged bearings‚ chain‚ or gears create mechanical noises‚ often escalating with speed or load․
Improperly aligned or loose mounting bolts can transmit vibrations throughout the vehicle․ U-joint issues or worn driveshaft components can also mimic transfer case NVH․ Furthermore‚ internal damage resulting from heavy towing or off-road use can lead to significant noise and vibration․ Regular maintenance and prompt attention to any unusual sounds are crucial for preventing more severe problems․


Leave a Comment